In all the projects listed below, I saved every scrap of decorative panel I pulled out of the RV, and those come in handy for other projects!! (covering the speaker boxes, the kitty cabinet, etc)
The original kitchen shelving was flimsy and we didn’t trust it to hold much. The one advantage of it was when pulling it out we could bend it a bit =)
I can’t remember if I had to remove the top shelf to get the bottom one out, but when putting the new ones in I definitely had to have the top out to get the bottom one in.
This is looking down into the bottom of the cabinet where the water heater is. You can see the 1×2 strips I added as shelf supports in place of the original ones. Not only are these much stronger material, but they are braced vertically against the solid plywood base. I used a combination of screws, wood glue, and metal “L” brackets to secure them in place.
A view of the new 1/2″ plywood shelving in place, with the shelf paper only applied to the top shelf so far. The color doesn’t match but it doesn’t look bad (in my opinion). It is challenging to match paper from online pictures, and part of the reason I selected this one was the width. The shelves were 25″ or so wide, and I wanted single sheets of shelf paper if I could manage it.
Side note: That original horizontal strip was a real fight! They used corrugated fasteners to hold it in place. Not only were they tough to pull out without destroying the particle board, but they are crazy sharp too. I did the best I could so I would be able to use it again, and this time I used angle irons to reattach it. There is a picture of a corrugated fastener below, if you don’t know what they are.
Under-sink hole
Like the belly storage area, our RV had a flimsy piece of “wood” thing hiding/protecting the sink drain pipe.
I never bent down low enough to even see this thing until a gallon jug of water disappeared under the sink. Kneeling on the floor, I found this thing, and my missing water jug lurking behind it, apparently sliding in transit.
If the idea was to protect the pipe, this thing is not doing its job.
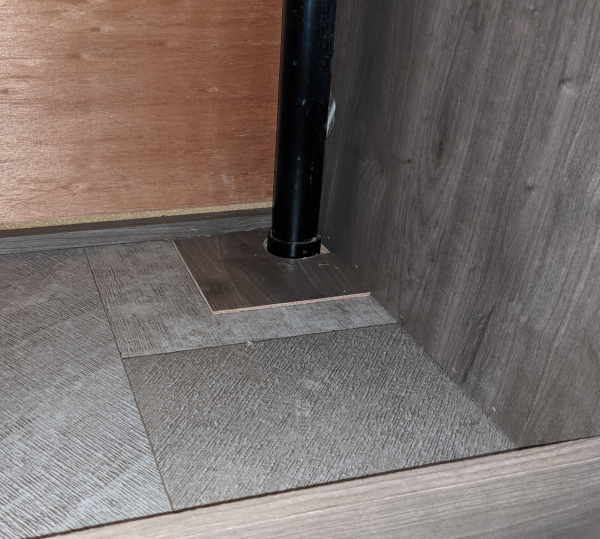
After removing the decorative board, I found that there was a fairly good sized hole in the floor for the pipe. Being a chilly day, I felt quite a draft coming up. I envisioned this as being an open (no pun intended) invite for rodents to enter our trailer as well.
I cut a 6″ square piece of that decorative Lauan and cut a hole for the pipe. I also cut a piece of foam play mat and glued/stapled it to the underside of the new hole cover, providing some small bit of insulation to the mix.
Lastly, I added a stronger bumper board to protect the pipe, both closer to the pipe (saving space) and also on both sides of it (so nothing slips behind it again).
Kitty Cabinet
No, we don’t store cats in cabinets (although it’s tempting to put the little monsters in there sometimes)
Brenda gets full credit for this one! We’re considering taking the cats on trips with us. We know they love getting into small spaces, and we’ve seen some really cute spaces people have made for their furry (independent, challenging, troublesome) friends. I had already popped the drawer out for access but Brenda was eyeballing the space under it for the cats.
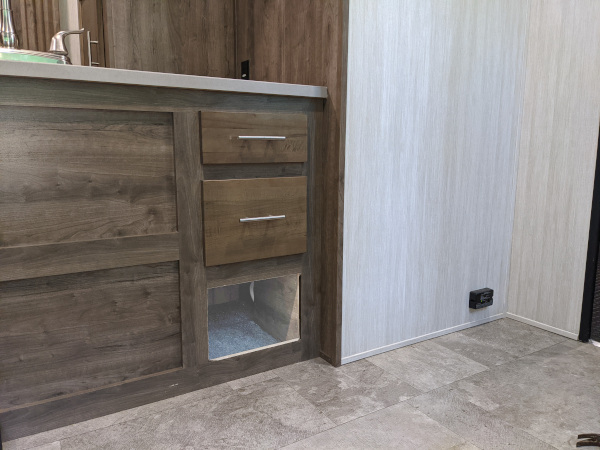
With the lower decorative panel removed. It was stapled in from the back and easily removed with a screwdriver, gently prying around the edges until staples could be pulled with pliers. I wanted to cover the water hose on the right (mostly for aesthetics).
Pushing the new right-side plywood in from the rear (only path it would fit through). The yellow foam is floor mat, just to provide a little more softness (and some leveling, since there is a support board in the middle of the floor there)
We had some carpeting left over from the bedroom stairs project, so we stapled and nailed that down over the foam mat. The decorative Lauan panels on left and right were cut from other projects (removed from shelves we replaced, etc)..
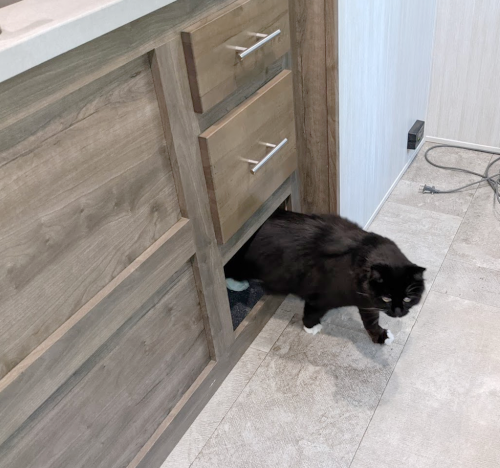
Finished product (minus cats). I lightened up the photo to show detail (too dark in original) so that’s why it looks a bit unnatural and the colors are off.
Bedroom: Closet Shelves
Original closet – no shelves. We never hang any clothes on our trips so the bar is a waste for us. We got tired of stowing and removing duffel bags from the closet and wanted an easier way to retrieve clothes. Especially since the closet is recessed — the “bedside stand” is in the way and you have to reach over it to get into the closet.
In this picture you can see where I already cut a few inches off the bottom front sill/kickplate/whatever-its-called, which was too tall. I just measured how much I could remove before you would see a gap between it and the bottom of the closet door. Then I removed that bottom board and cut some off (from the bottom, so the top edge is still covered with the factory shelf paper). It was held on using the corrugated fasteners like the one in the kitchen cabinets was (see above). I hate those things! Like I did in the kitchen, I reattached it with angle irons.
This is after the shelves are in place. Sorry, I was bad about taking pictures during the progress of this one! I again used the same method as in the kitchen – 1×2 strips mounted vertically for strength, each set resting on the shelf below it.
The distance between each shelf was somewhat arbitrary. I eyeballed each, picturing how much room I might need (especially the lower ones) to reach down and into the shelf to pull out clothes. The top shelf placement was dictated in part by where the braces were for the rod. I removed the rod but didn’t want to risk damaging the wall by also removing the wood brace for it.
Each shelf was measured (many times!) and cut to fit, because the back wall of the closet is the curved nose piece of the trailer.
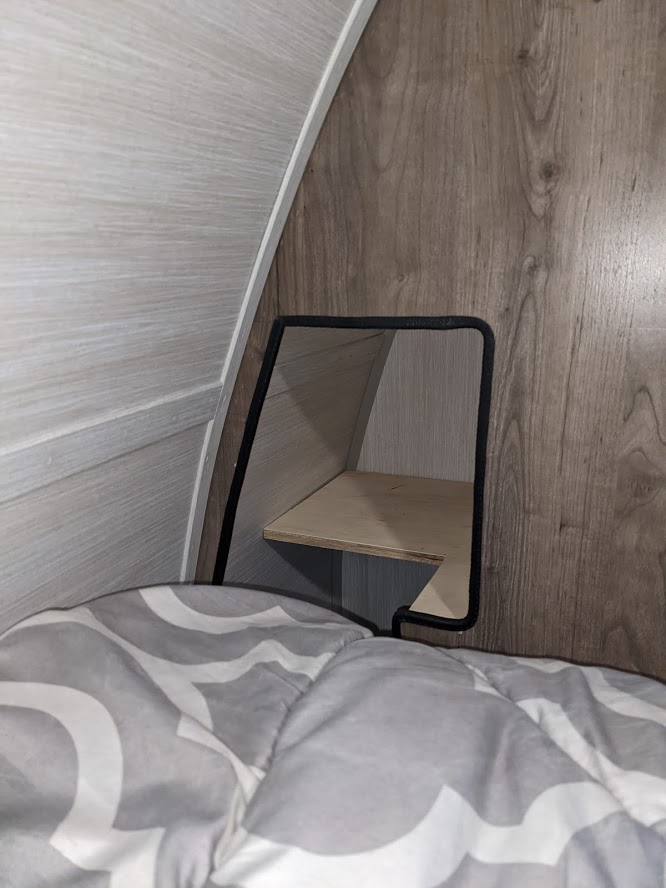
I decided that the depth of the bottom two shelves was far too deep to be practical, so I opted to use that area as a bedside stand instead.
I added a “back” to the second shelf (out of frame) to keep clothing on it separated from the area pictured. I made the odd shaped “L” in the plywood for improved access to the bottom shelf.
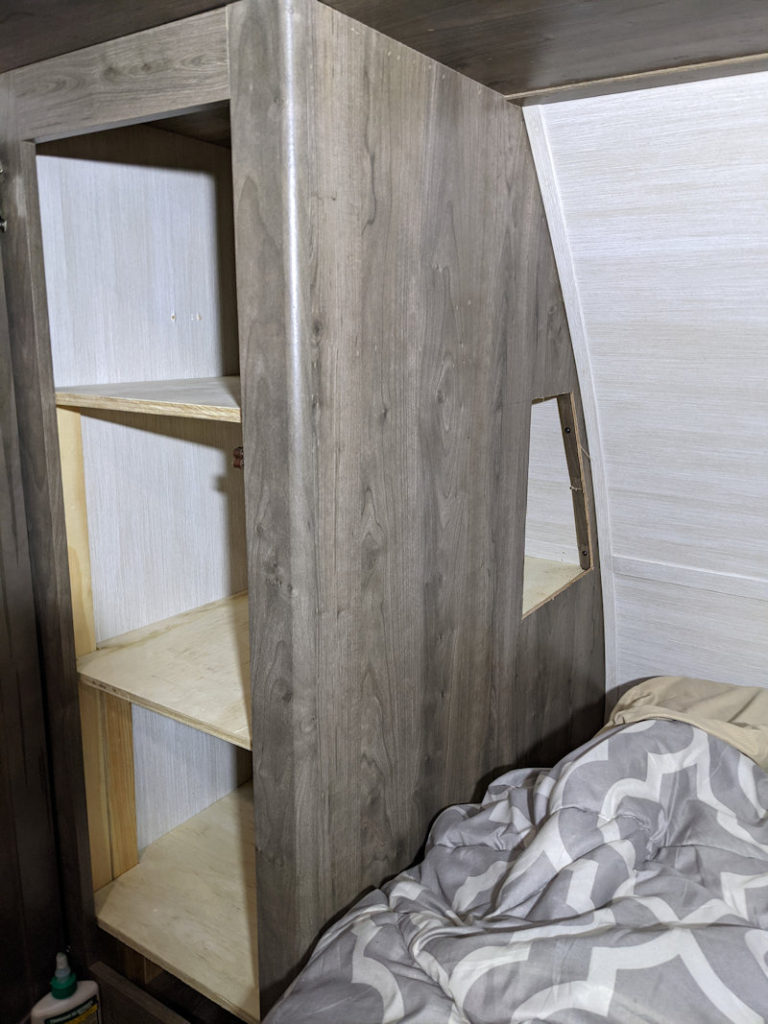
On the other side of the bed, the area blocked off at the bottom (the hoses on the backside of the water panel) forced me to change my tactics a bit.
There has GOT to be a more elegant solution! I removed the factory wood framework around the hoses so I could make it sturdier and lower it an inch or two. I didn’t want to have to unscrew everything if I have to access those hoses so I didn’t glue the supports in nor use the L shaped angle brackets like I did in the other cabinet.
I did glue in the bottom shelf supports because they are out of the way. The first (tallest) 2×2 you can see just inside the cabinet runs through holes in the first and second shelves to support the top shelf. Likewise, the next 2×2 runs through a hole in the bottom shelf to support the second shelf. With this method, the supports are held in place by the lower shelves. Unfortunately, I still have to pull everything out but I would have had to anyway – the shelves have to be rotated to get them out, and there is not enough room (appx 1 ft) between them to accommodate this.
Garage: Coat Hooks
We often have wet clothes or our heavy motorcycle jackets that we want to hang up in the garage. This hook panel was from Home Depot and was the widest that would fit in the space between corner and door.
The holes in it did not align with the wall studs so I drilled different ones. Also pictured is the over-the-door towel hanging rack. Brenda found this online (or was it Campers World?) and we like it because it’s pretty solid.
Belly: Water Pump Protection
Before
After
It bothered me that the lauan panel ‘protecting’ the water pump and these hoses was flimsy (at best) and took up unnecessary space. So we replaced it with smaller, sturdier boards. Everything is screwed into place for reasonable removal (i.e. for winterizing operations) and I feel like it will do a better job at keeping things from banging into the pump.


Recent Comments